The final piece of our pentest lab is the attacking machine. I didn’t include this in the initial diagram however we are going to want this here to enable our testing.
We could look at tunneling an attacking machine through for bits and pieces but nothing beats having a machine within the broadacast domain to listen and intercept broadcast traffic.
Kali has always been my goto for a pentesting OS. I generally use Kali Lite with all the software and tool that I use manually added as it is quick and lightweight. With a good configuration it can spin up in around 5 seconds and be ready to go straight away. However with the recent release of Kali 2019.4 I thought i’d give the full phat version a try for our attacking VM.
First step is obviously to get the Kali ISO. Get this from the official download page. Never ever ever ever get it from anywhere else. seriously. We want the one at the top of the table - Kali Linux 64-Bit
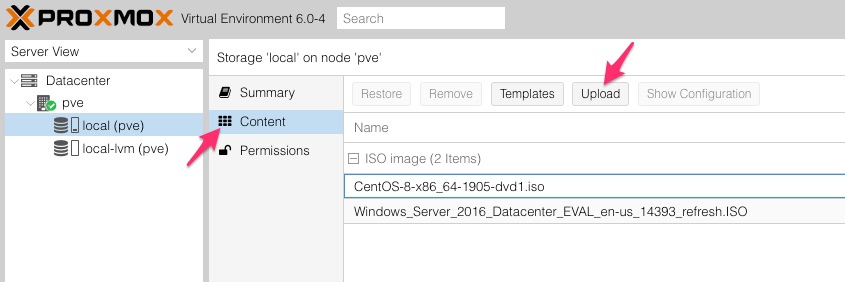
It can then be loaded in to the proxmox storage the same as we have done before. Go to Datacenter > pve > local (pve) > Content and click the Upload button.
VM Configuration
Once the ISO is uploaded click the Create VM button. As in previous steps I won’t cover all options, just the necessary ones.
-
General
Node- set to pve unless you have other nodes that you want to spread things around onVM ID- You can choose whatever you want here. I have my server at 100 and my two clients at 200 and 201 so to keep the theme i;m going with 300.Name- Again go with whatever you want. I have chosenkali-2019.4 -
OS
ISO image- Choose the Kali ISOType- LinuxVerson- 5.x - 2.6 Kernel -
System
Qemu Agent- tickedSCSI Controller- VirtIO SCSI -
Hard Disk
Bus/Device- SCSI/0Cache- Write backDisk Size (GiB)- I will leave this at 32 GiB -
CPU
Cores- 2 -
Memory
Memory (MiB)- 2048 -
Network
Bridge- vmbr0 (unless you have done something else)Model- VirtIO (paravirtualised)
Confirm everything is all OK on the last screen and click Finish.
OS Installation
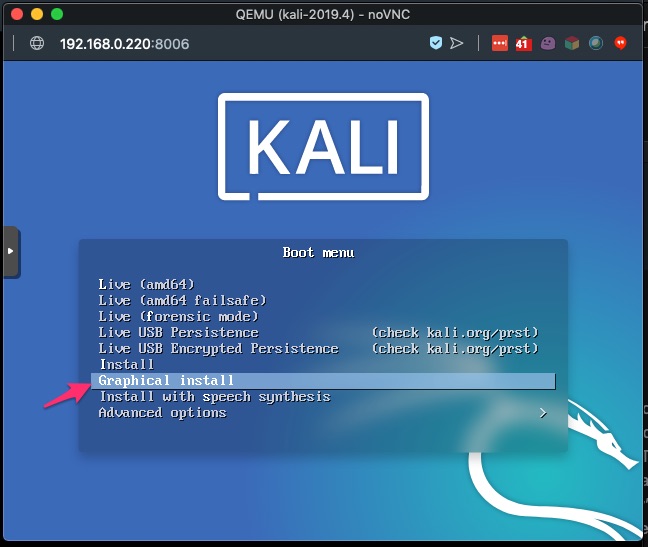
Select the VM in your Proxmox dashboard and click Start then launch the Console
At the boot menu choose Graphical install. If we wanted to we could just run the Live instance of Kali here however we wouldn’t be able to persist through reboots.
Choose your language, location and keybaord layout appropriately.
Installer will now load some components and then attempt network auto-config via DHCP. Ensure that you have your virtual server booted up so that it can issue an IP address.
Next set your host name. I would generally set it to the same as the VM name so in this case kali-2019.4 and click Continue.
Enter a password for the root user, confirm and click Continue.
For disk partitioning I’d recommend choosing Guided - use entire disk and clicking Continue.
You should then be able to choose the disk to install in and will likely just see the one that is attached to our VM. Click Continue.
You are then presented with an option to choose how you want the folders stored. I’ve been using Linux for over 20 years and still just choose the first option, All files in one partition. Do this and click Continue
Select Finish and click Continue.
Select Yes and click Continue.
The installer will now proceed with installing the system to the VM. Give it a few minutes and grab a coffee.
When you come back the data transfer will hopefully have completed, there are a few more settings to configure before we are done.
On the next screen choose Yes for using a network mirror and click Continue. Leave the proxy info blank and click Continue again.
Installer will do some internet stuff for a few minutes, downloading latest packages, etc.
Next step is the Grub boot loader install. The installer needs to stick this to the MBR which will be on /dev/sda.
Choose Yes to Install the GRUB boot loader to the master boot record. Select /dev/sda and click Continue.
Kali will now complete the installation, during which it also installs the qemu-guest-agent for us sutomatically which is nice. Once it has completed the installation you will be given a reboot screen. Click Continue and the VM will reboot in to our new Kali installation.
Once you are at the login screen you can login with username root and your previously entered password.
You will now be at the desktop of your shiny new Kali intallation. I’d recomend opening the terminal and running the below to update the system.
apt-get update
apt-get upgrade
At this point the installation is complete. You now have an attacking VM within your infrastructure. Apologies for the lack of screenshots in this write up but I didn;t think you’d need it.